The Periodic Table Sculpture is complete and ready to be installed. We are moving forward with an artist-in-residence next fall to create an painted environment around the sculpture in the media center. To see more about this collaborative STEAM project, please watch the video below.

Showing posts with label Collaborations. Show all posts
Showing posts with label Collaborations. Show all posts
Thursday, May 14, 2015
It's been a while- Periodic Table Sculpture is complete!
The Periodic Table Sculpture is complete and ready to be installed. We are moving forward with an artist-in-residence next fall to create an painted environment around the sculpture in the media center. To see more about this collaborative STEAM project, please watch the video below.

Monday, March 9, 2015
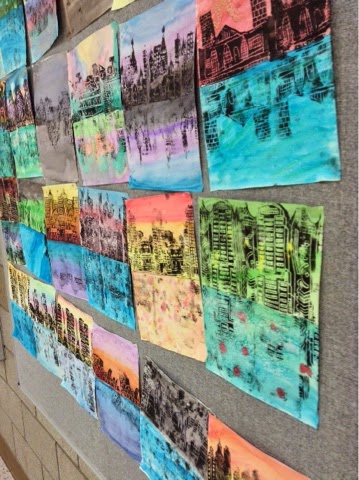
Reflecting Architectural Printing

We have been spending a lot of time this quarter drawing, printing and
sculpting architectural structures. We started with our reflection
watercolor prints of famous architectural wonders and then moved onto large-scale paper mache Gothic cathedrals. Photos to come soon!


Monday, March 2, 2015
Paper Mache Gothic-Inspired Cathedrals
Over the last couple of weeks we have been working on architecture
design- drawing, printing and now over-sized paper mache relief
sculptures. This was a feat for us since we only created 7 works, one on
each table in the classroom (more about that later).
To begin we watched an amazing NOVA-produced video called the Building the Great Cathedrals. It was a perfect introduction to these engineering marvels. Students were then asked to draw a Gothic style cathedral using a shape tracing method shown in Deep Space Sparkle's Architecture Made Easy PDF. These drawings became our blueprints for how were were going to construct the cardboard and paper mache sculptures.
The plan was to have each table create a cathedral. That's right- one project per table...all day long. As each class came in for the day, whomever sits at that table would continue to add to that work. This was a challenge in itself; we worked the best we could with what was left after each block. However, this turned out to be a very successful large scale project challenge. Not only was it engaging but the transfer of skills from collaboration, to communication to just plain ol' perseverance was hard to ignore. Nice job 7th graders!


To begin we watched an amazing NOVA-produced video called the Building the Great Cathedrals. It was a perfect introduction to these engineering marvels. Students were then asked to draw a Gothic style cathedral using a shape tracing method shown in Deep Space Sparkle's Architecture Made Easy PDF. These drawings became our blueprints for how were were going to construct the cardboard and paper mache sculptures.
The plan was to have each table create a cathedral. That's right- one project per table...all day long. As each class came in for the day, whomever sits at that table would continue to add to that work. This was a challenge in itself; we worked the best we could with what was left after each block. However, this turned out to be a very successful large scale project challenge. Not only was it engaging but the transfer of skills from collaboration, to communication to just plain ol' perseverance was hard to ignore. Nice job 7th graders!
Sunday, December 14, 2014
Unusual Mediums for Usual Subjects
Portrait drawing...ugh.
Most students have this reaction when they learn of our unit on portraits because they feel incapable when it comes to drawing a human face realistically. So...we practice...and practice some more. We draw together, we draw with YouTube videos and we use step-by-step drawing portraits tutorials. Never mind the fact that most students have practiced portraits one way or another since 3rd grade. Still, it's not a favorite subject of most kids. Even when I mix up the mediums we use, students are still timid and unsure of their work.
This quarter, I was reintroduced to the work of Cheeming Boey. Although his cup drawings have been around for a while, I felt like his work was being pinned liked crazy lately and the more I dug into researching him, the more I wanted to connect his style and medium choices to our portrait unit. Videos showcasing his work distinctly encompass the 8 Studio Habits of Mind, and I had to share with his process with 8th grade art students.
Great videos of Boey here and here.

We began these works with sketching entire portraits using the typical method (head shape first, draw lines to mark the middle of the face, add eyes, etc). However, once we felt OK with drawing portraits in the typical way, we moved on to starting with just one eye. Boey mentions in his interviews that he doesn't necessary start with the large shapes first. We decided to do that same. We began with a detailed eye on the cup and then rest of the portrait (what we could fit anyway) fell into place.
A bordered band completed the top of the cup. We found some great inspiration here.
So much fun...


The stands were created with a dowel and a small wooden circle to act as the base. We basically punched holes in the cups and strung them on. Tissue paper adds a pop of color.
Come back soon to check out our next installment of "unusual materials for usual subjects"- Picasso Pop Can Portraits!
Most students have this reaction when they learn of our unit on portraits because they feel incapable when it comes to drawing a human face realistically. So...we practice...and practice some more. We draw together, we draw with YouTube videos and we use step-by-step drawing portraits tutorials. Never mind the fact that most students have practiced portraits one way or another since 3rd grade. Still, it's not a favorite subject of most kids. Even when I mix up the mediums we use, students are still timid and unsure of their work.
This quarter, I was reintroduced to the work of Cheeming Boey. Although his cup drawings have been around for a while, I felt like his work was being pinned liked crazy lately and the more I dug into researching him, the more I wanted to connect his style and medium choices to our portrait unit. Videos showcasing his work distinctly encompass the 8 Studio Habits of Mind, and I had to share with his process with 8th grade art students.
Great videos of Boey here and here.
We began these works with sketching entire portraits using the typical method (head shape first, draw lines to mark the middle of the face, add eyes, etc). However, once we felt OK with drawing portraits in the typical way, we moved on to starting with just one eye. Boey mentions in his interviews that he doesn't necessary start with the large shapes first. We decided to do that same. We began with a detailed eye on the cup and then rest of the portrait (what we could fit anyway) fell into place.
A bordered band completed the top of the cup. We found some great inspiration here.
So much fun...
The stands were created with a dowel and a small wooden circle to act as the base. We basically punched holes in the cups and strung them on. Tissue paper adds a pop of color.
Come back soon to check out our next installment of "unusual materials for usual subjects"- Picasso Pop Can Portraits!
Wednesday, November 12, 2014
Day of the Dead Calaca Collage Collaboration
In our middle school course scheduling, 8th graders take both Spanish and Art as quarter classes during first semester. Since the classes are offered back to back in the fall, we (Mrs. Einerwold, Mrs. Peroddy and myself) organized a collaborative project that combined both a Dia de los Muertos iMovie video project with a paper collage artwork.
Check out the entire project outline and resources below. Of course, we were initially inspired by this fabulous project: Día de los Muertos Calavera Collage from Modern Art 4 Kids. Mrs. Einerwold started things off with the 8th grade students in Spanish creating informational videos about Dia de los Muertos. Students were asked to follow a simple outline to ensure the most factual information about Day of the Dead was presented in their work.

The videos were then viewed by the 4th grade art students as an introduction to their Calaca Collage project. A student example is posted below.
The double-sided collage was then started by our 4th grade partners (Mrs. Peroddy's video demo below). See Mrs. Peroddy's introductory blog post here.
Once the 4th graders finished their sides, the artworks were delivered to the middle school where 8th graders began creating the other half. Students were asked to complete a worksheet with the following questions to begin this process.

8th graders were encouraged to use a variety of materials for their collages. Options were colored construction/patterned paper, colored masking tape, Sharpies, glitter glue, squeezable puff paint, metallic sticker paper, sequins and embroidery floss.
Now...for 8th grade progress at this point:


These works will be displayed in our hallways at the end of this week. Please check back for a final view of our Day of the Dead Calaca Collage Collaborations soon!
Check out the entire project outline and resources below. Of course, we were initially inspired by this fabulous project: Día de los Muertos Calavera Collage from Modern Art 4 Kids. Mrs. Einerwold started things off with the 8th grade students in Spanish creating informational videos about Dia de los Muertos. Students were asked to follow a simple outline to ensure the most factual information about Day of the Dead was presented in their work.


The videos were then viewed by the 4th grade art students as an introduction to their Calaca Collage project. A student example is posted below.
The double-sided collage was then started by our 4th grade partners (Mrs. Peroddy's video demo below). See Mrs. Peroddy's introductory blog post here.
Once the 4th graders finished their sides, the artworks were delivered to the middle school where 8th graders began creating the other half. Students were asked to complete a worksheet with the following questions to begin this process.
You will be choosing a 4th grade Day of the Dead calaca as the starting point for your artwork. As
you look through the artworks, take note (in your brain) what features of the
artwork catches your eye. Then
answer: What do you like about it? Why did you choose this artwork? Be
specific.
Your calaca will be the “big brother” or “big sister” to the existing one in the work. Your calaca
doesn’t have to match the other one exactly, but we should be able to see
correlations between the two. You are creating features that enhance what the 4th
grader already did. What
features are you going to highlight in your own work? Again, be specific and list at least three
ideas (these could be color, pattern, line design, characteristics of features
or accessories, etc). How are you
going to add your own twist in your addition? How can you build upon what the 4th grader did to create unity in the work?
8th graders were encouraged to use a variety of materials for their collages. Options were colored construction/patterned paper, colored masking tape, Sharpies, glitter glue, squeezable puff paint, metallic sticker paper, sequins and embroidery floss.
These works will be displayed in our hallways at the end of this week. Please check back for a final view of our Day of the Dead Calaca Collage Collaborations soon!
Thursday, October 30, 2014
STEAM Collaboration- Periodic Table Sculpture
BMS students are so excited to begin this new STEAM-infused project happening this quarter!


Overview of the project-
During Q2 and Q3, some STEAM classes (Science,
Technology, Engineering, Art and Math) are planning a multi-grade,
multi-subject Periodic Table sculpture project that will tie in with a mural being planned in the media
center. The Periodic
Table Sculpture will be a permanent piece of art for our building.
Students in 7th grade tech and science as well as 8th grade
science and art
students are all going to invest
in parts of the planning, research and/or creation of the table
sculpture.
In order to kick this off this multi-grade, multi-subject collaborative project,
7th
and 8th
grade students will be watching Nova's Hunting the Elements documentary this
Friday afternoon.
Today in 8th grade art class, we are matching the 10 groups of the periodic table to our 10 material choices. Mirror, leather, granite, glass tile, shiny and burnished metal, Plexiglass, stone tile and two wood species will make up our giant table of elements sculpture. We'll be posting the results of the material survey soon.
Today in 8th grade art class, we are matching the 10 groups of the periodic table to our 10 material choices. Mirror, leather, granite, glass tile, shiny and burnished metal, Plexiglass, stone tile and two wood species will make up our giant table of elements sculpture. We'll be posting the results of the material survey soon.
Monday, June 9, 2014
Sci/Art Game Board Design
7th grade students end their science class with a review board game design. This quarter, we designed and created the games in art as a collaborative group project. We began this unit by looking at famous board games like Life, Candyland and Monopoly and what makes those games artistically well-designed. We also focused on how important the element of line is in board games (and commercially produced printed toys in general). Sharpies, colored pencils, metallic sticky paper and of course, 3D puff paint were our media choices in this project. Game markers were made with Model Magic and Fimo clay.
Student games focused the five science and health units covered in 7th grade: Exploring & Classifying Life, Cells & Chemistry of Life, Reproduction & Heredity, Ecology, Human Body and Diseases.


Tuesday, May 27, 2014
Infographics in art class!
As a cumulative project for both science and art class this quarter, 7th grade students made infographics using the online creator, Piktochart. Each student was asked to choose a environmental science topic to research and use that information and data to show graphs, facts and illustrations within their infographic.
Piktochart.com allows students to create a free account and access a number of free templates to plan their work. We spent some time looking at what makes a strong infographic (such as contrasting font color on the background, layering images to create depth, etc) before actually sitting down at the computer. We also used some guiding questions/statements to help organize our work.

After we finished our work, we saved the infographics as jpeg files and turned them in through Edmodo.
Students examples:


Piktochart.com allows students to create a free account and access a number of free templates to plan their work. We spent some time looking at what makes a strong infographic (such as contrasting font color on the background, layering images to create depth, etc) before actually sitting down at the computer. We also used some guiding questions/statements to help organize our work.
Our
three essential questions/statements:
Why should we CARE?
What can we do to HELP?
We need to know MORE!
Students examples:
Friday, April 11, 2014
2014 Art Show is underway!
This year's art show is up and running! Come check out our work at the Becker Public Library from now until May 8th. Congratulations to all students who were involved this year. Fabulous work!


Wednesday, March 21, 2012
Our trip to the Weisman
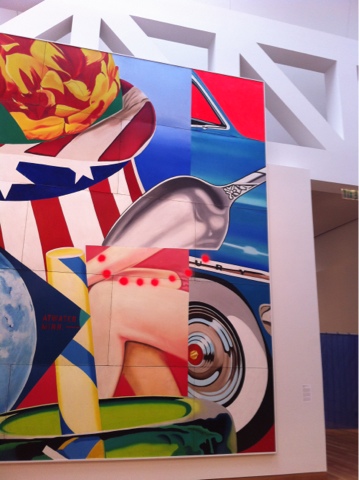
Today was the day! We had a great time finally meeting our Art Collaborative group members from North Jr. High and Annandale Middle School. We met at the Weisman Art Museum on the U of M campus to view artwork and trade our artist trading cards. We had a great time!


Wednesday, March 7, 2012
Tuesday, March 6, 2012
Collaboration artwork: 94 7th graders, a three yr. old and Mrs. Hare
Here it is! The finished piece! What started as an experiment of 7th graders rolling paper tubes turned into a pretty cool collaboration 3D assemblage.
We spent a few spare minutes a couple of weeks ago rolling strips of paper into tubes. Each student rolled an average of 10 in the time given. We weren't really sure what we would do with them all but good thing we made so many! Assembling them all together took Mrs. Hare and her three-year-old son about 2 1/2 hours (Emerson helped dip them in glue). A little glitter spray and rhinestones complete the "super nova" look. This piece is going to be displayed at the district art show during the month of March. Come check it out at the Becker Public Library!

 |

Subscribe to:
Posts (Atom)